Typora 的使用其实都在 帮助 菜单里,本文是其中的一些总结, markdown 的基本语法不再提及。
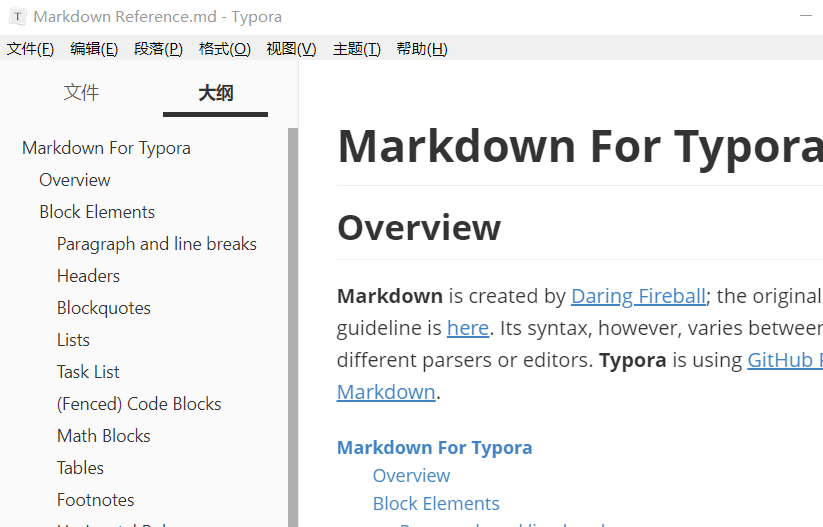
大纲视图
在视图菜单里可以调节各种视图。

一些符号
KBD
Command
效果
Task List
1
2
| - [ ] incomplete
- [x] completed
|
效果
- [ ] incomplete
- [x] completed
脚注,有悬停标注的特性,适合于解释某些名词,例如
相对论是爱因斯坦1创立的。
通过【段落】- 【脚注】操作
1
2
3
| 相对论是爱因斯坦1创立的。
[^1]: 德国物理学家,诺贝尔奖获得者。
|
高亮
文本高亮首先要在 【文件 - 偏好配置】,打开 【扩展语法 - 高亮】,而后
==高亮文本==
HTML 元素
以上还只是在 Typora 给定范围内的功能,实际上 Typora 本身是个能解析 Html 的“浏览器”,这个软件界面包括菜单项都是 Html 元素,使用者所编写的 markdown 语句最终也被解析成了 html 元素而已。
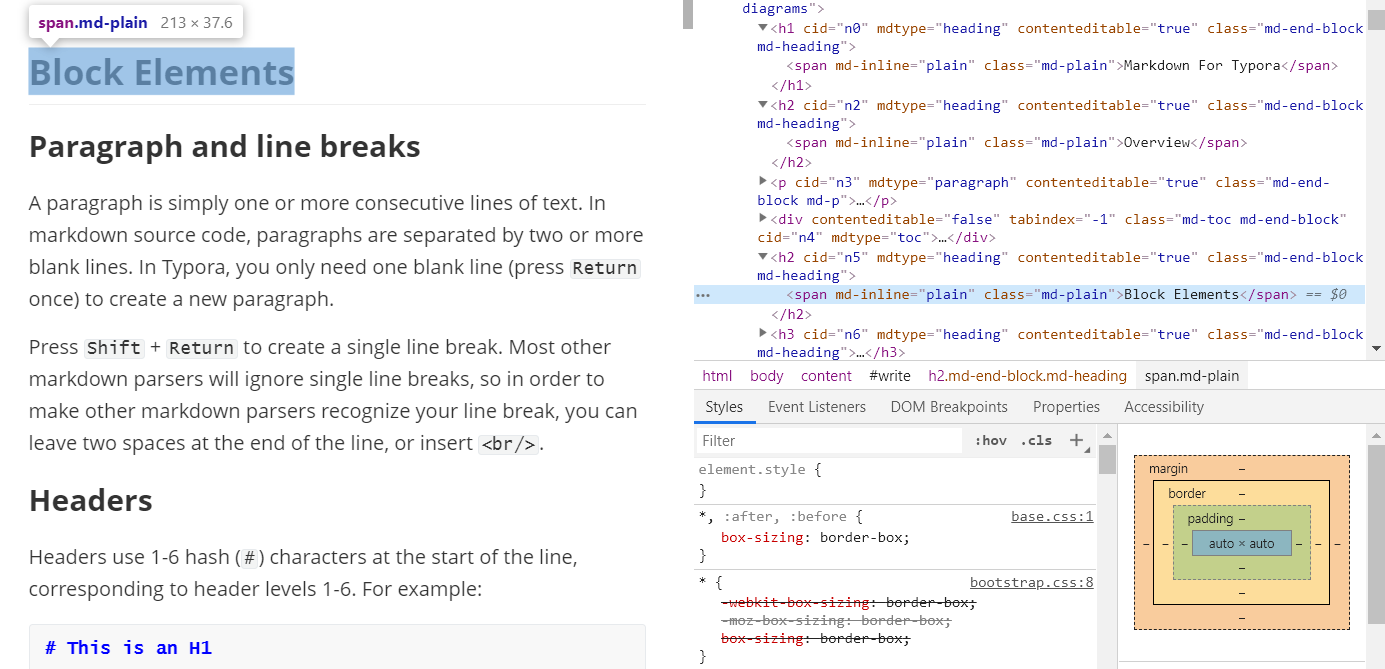
我们打开【视图-开发者模式】就会看到类似于 chrome 开发者模式的控制台,

可见标题 【Block Elements】是以 h2 和 span 标签的形式嵌入到 html 文档中的。
利用这一点,我们可以直接插入 Html ,并利用 CSS 属性改变样式。
例如我们借助 video 标签插入一段视频
1
| <video src="..\img\got.mp4" />
|
Bilibili上的视频直接可以得到嵌入代码,非常容易插入,例如
1
2
| <iframe height="600" width="100%" src="//player.bilibili.com/player.html?aid=48521546&cid=84967122&page=1" allowfullscreen="true" >
</iframe>
|
再例如我们要插入一段蓝色文本,可以采用内联样式
国际米兰的颜色是蓝色和黑色。
1
| <div align="center">国际米兰的颜色是<span style="color:blue"><b>蓝色</b></span>和黑色。</div>
|
因为我们无法操作 head 标签,所以无法采用内部样式表和外部样式表的方式来改变样式。
图片
插入图片可以直接拖拽,也可以使用【编辑-图片工具-插入本地图片】操作。生成的 markdown 语法如下
1
| 
|
如果要改变图片的显示方式,就不能采用这种方式了。应该直接使用 img 标签,这样可以通过修改样式来改变图片的大小和对齐方式
1
2
3
| <div align="center">
<img src="http://img.mp.itc.cn/upload/20170105/d05be7e27f414afc90940ef7da148ddd_th.jpg" alt="改变图片大小和对齐" style="margin:3px;border:2px solid #be5abe;width:600px;height:300px; "/>
</div>
|
这里为了实现对齐,添加了一个 div 元素。也可以采用简化操作
1
2
3
| <center>
<img src="http://img.mp.itc.cn/upload/20170105/d05be7e27f414afc90940ef7da148ddd_th.jpg" alt="改变图片大小和对齐" style="zoom:50% "/>
</center>
|

在插入图片的时候,选择【编辑-图片工具- 图片设置】,选择将图片复制到指定文件夹,可以保存图片。
主题和CSS
打开【文件 - 偏好设置 - 主题文件夹】可以发现主题 CSS 文档,通过修改参数可以定制主题。
Typora 使用 CSS 文档的顺序如下:
- Typora’s basic styles.
- CSS for current theme.
base.user.css under theme folder.{current-theme}.user.css under theme folder. eg:github.user.css
在主题文件夹中创建 base.user.css 和 {current-theme}.user.css 即可以实现改变样式属性的目的。例如在 github.user.css 文件中写入
1
2
3
| span {
color: #f484c1;
}
|
即可以改变所有 span 标签的文本颜色。但是这种方法无法使用 id 和 class 选择器。
文字从右向左
添加以下 CSS 代码即可。
1
2
3
| #write {
direction: rtl;
}
|
效果如下
文字从右向左
这个效果虽然简单,其中使用的 id 选择器却值得注意, 翻阅源码可以发现,整个内容文本都被放置在 id 为 “write” 的 div 块元素中 。这段 CSS 代码就是针对内容区所有对象进行设置。
另外,如果我们自己添加元素,并设置 id 或者 class,如下
1
| <p id="jack">好看撒大撒大撒啊</p>
|
这个 P 元素会被套在若干个 div 块里,所设置 id 和 class 属性都不会保留, 其它属性如 style 则可以保留并发挥作用。
背景图片
背景虽然不实用,但如果要设置,首先还是要寻找合适的纹理文件
纹理文件下载
[纹理文件下载]:
下载拷贝到主题文件夹,添加 CSS 代码
1
2
3
4
| content {
background: url(./fzm-seamless.notebook.texture-06.jpg);
background-repeat: repeat;
}
|
代码块
调节代码块的意义更大一些,先给个效果图

添加如下 CSS 代码
1
2
3
4
5
6
7
8
9
10
11
12
13
14
15
16
17
18
19
20
21
22
23
24
25
26
27
28
29
30
31
32
33
34
35
36
37
38
39
40
41
42
43
44
45
46
47
48
49
50
51
52
53
54
55
| .cm-s-inner {
background-color: #263238;
color: rgba(233, 237, 237, 1);
}
.cm-s-inner .CodeMirror-gutters {
background: #263238;
color: rgb(83,127,126);
border: none;
}
.cm-s-inner .CodeMirror-guttermarker, .cm-s-inner .CodeMirror-guttermarker-subtle, .cm-s-inner .CodeMirror-linenumber { color: rgb(83,127,126); }
.cm-s-inner .CodeMirror-cursor { border-left: 1px solid #f8f8f0; }
.cm-s-inner div.CodeMirror-selected { background: rgba(255, 255, 255, 0.15); }
.cm-s-inner.CodeMirror-focused div.CodeMirror-selected { background: rgba(255, 255, 255, 0.10); }
.cm-s-inner .CodeMirror-line::selection, .cm-s-inner .CodeMirror-line > span::selection, .cm-s-inner .CodeMirror-line > span > span::selection { background: rgba(255, 255, 255, 0.10); }
.cm-s-inner .CodeMirror-line::-moz-selection, .cm-s-inner .CodeMirror-line > span::-moz-selection, .cm-s-inner .CodeMirror-line > span > span::-moz-selection { background: rgba(255, 255, 255, 0.10); }
.cm-s-inner .CodeMirror-activeline-background { background: rgba(0, 0, 0, 0); }
.cm-s-inner .cm-keyword { color: rgba(199, 146, 234, 1); }
.cm-s-inner .cm-operator { color: rgba(233, 237, 237, 1); }
.cm-s-inner .cm-variable-2 { color: #80CBC4; }
.cm-s-inner .cm-variable-3 { color: #82B1FF; }
.cm-s-inner .cm-builtin { color: #DECB6B; }
.cm-s-inner .cm-atom { color: #F77669; }
.cm-s-inner .cm-number { color: #F77669; }
.cm-s-inner .cm-def { color: rgba(233, 237, 237, 1); }
.cm-s-inner .cm-string { color: #C3E88D; }
.cm-s-inner .cm-string-2 { color: #80CBC4; }
.cm-s-inner .cm-comment { color: #546E7A; }
.cm-s-inner .cm-variable { color: #82B1FF; }
.cm-s-inner .cm-tag { color: #80CBC4; }
.cm-s-inner .cm-meta { color: #80CBC4; }
.cm-s-inner .cm-attribute { color: #FFCB6B; }
.cm-s-inner .cm-property { color: #80CBAE; }
.cm-s-inner .cm-qualifier { color: #DECB6B; }
.cm-s-inner .cm-variable-3 { color: #DECB6B; }
.cm-s-inner .cm-tag { color: rgba(255, 83, 112, 1); }
.cm-s-inner .cm-error {
color: rgba(255, 255, 255, 1.0);
background-color: #EC5F67;
}
.cm-s-inner .CodeMirror-matchingbracket {
text-decoration: underline;
color: white !important;
}
.md-fences {
background-color: #263238;
color: rgba(233, 237, 237, 1);
border: none;
}
.md-fences .code-tooltip {
background-color: #263238;
}
|
我们写的代码块会被转化为一个复杂的 div 盒子,这个盒子的一个 class 属性就是 “cm-s-inner”,内部元素各有各的 class 命名,例如展示代码的行号的 div 盒子的 class 是 “CodeMirror-gutters”,因此这里给它设置的是一个二级匹配器。
字体
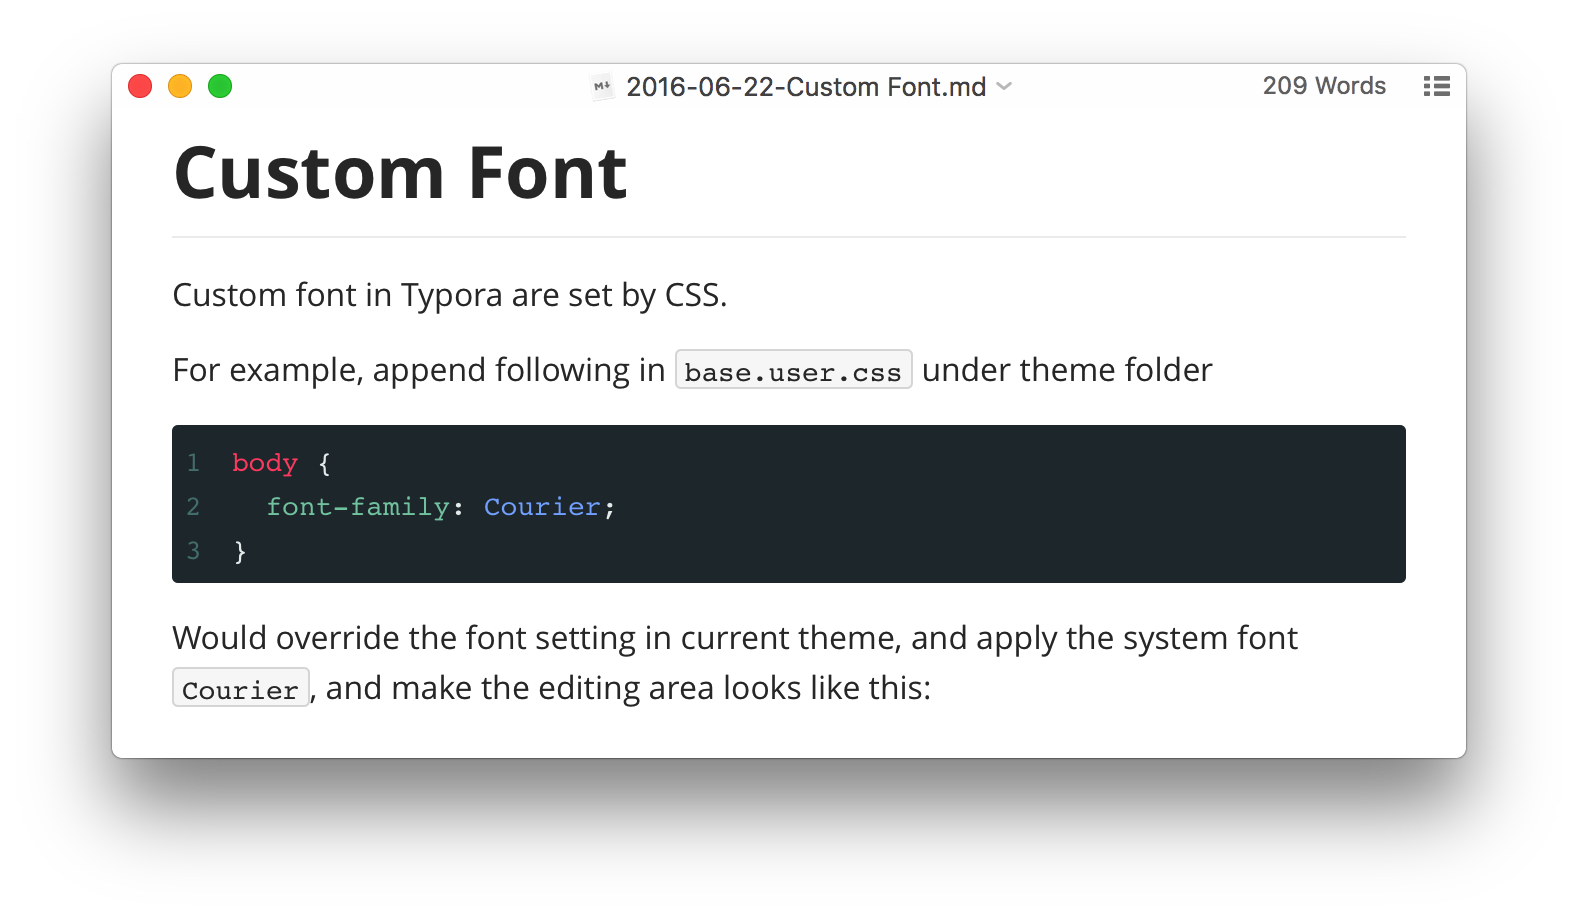
更改字体设置如下
1
2
3
| body {
font-family: DFKai-SB;
}
|
字体名称可以在 【C:\Windows\Fonts】目录下查看,也可以在 【设置-字体】中查找,例如微软雅黑的全名是 Microsoft Yahei UI。
下载新字体,例如徐静蕾字体,放入上述目录中即安装成功字体,此时查出此字体名称为 “方正静蕾字体”,即可以配置使用。
宽度
1
2
3
| #write {
max-width: 1800px;
}
|
打开 Tepora 是文本宽度将扩展到1800 px,可以调整打开时的视觉效果。
标题编号
添加如下 CSS 代码可以给各个标题自动生成编号,这个功能实际上并不怎么有用,但可以用来学习 CSS。
1
2
3
4
5
6
7
8
9
10
11
12
13
14
15
16
17
18
19
20
21
22
23
24
25
26
27
28
29
30
31
32
33
34
35
36
37
38
39
40
41
42
43
44
45
46
47
48
49
50
51
52
53
54
55
56
57
58
59
60
61
62
63
64
65
66
67
68
69
70
71
72
73
74
75
76
77
78
79
80
81
82
83
|
#write {
counter-reset: h1
}
h1 {
counter-reset: h2
}
h2 {
counter-reset: h3
}
h3 {
counter-reset: h4
}
h4 {
counter-reset: h5
}
h5 {
counter-reset: h6
}
#write h1:before {
counter-increment: h1;
content: counter(h1) ". "
}
#write h2:before {
counter-increment: h2;
content: counter(h1) "." counter(h2) ". "
}
#write h3:before,
h3.md-focus.md-heading:before {
counter-increment: h3;
content: counter(h1) "." counter(h2) "." counter(h3) ". "
}
#write h4:before,
h4.md-focus.md-heading:before {
counter-increment: h4;
content: counter(h1) "." counter(h2) "." counter(h3) "." counter(h4) ". "
}
#write h5:before,
h5.md-focus.md-heading:before {
counter-increment: h5;
content: counter(h1) "." counter(h2) "." counter(h3) "." counter(h4) "." counter(h5) ". "
}
#write h6:before,
h6.md-focus.md-heading:before {
counter-increment: h6;
content: counter(h1) "." counter(h2) "." counter(h3) "." counter(h4) "." counter(h5) "." counter(h6) ". "
}
#write>h3.md-focus:before,
#write>h4.md-focus:before,
#write>h5.md-focus:before,
#write>h6.md-focus:before,
h3.md-focus:before,
h4.md-focus:before,
h5.md-focus:before,
h6.md-focus:before {
color: inherit;
border: inherit;
border-radius: inherit;
position: inherit;
left:initial;
float: none;
top:initial;
font-size: inherit;
padding-left: inherit;
padding-right: inherit;
vertical-align: inherit;
font-weight: inherit;
line-height: inherit;
}
|
右键搜索
选中文本后,可以右键选择 google 搜索,但是没有翻墙是无用的。在【文件 - 偏好设置 -高级设置】中打开 【文件 conf.user.json】,加入
1
2
3
4
5
6
| "searchService": [
["Search with Google", "https://google.com/search?q=%s"]
["Search with baidu", "https://www.baidu.com/s?ie=UTF-8&wd=%s"]
["Translate", "https://translate.google.cn/#view=home&op=translate&sl=auto&tl=en&text=%s"]
["Search with Wikipedia", "https://en.wikipedia.org/wiki/Special:Search/%s"]
],
|
四个选项分别是 Google搜索,百度,百度翻译,英文Wiki。
PanDoc
PanDoc 是一个标记语言的翻译器,例如能够将 Html 文本转换为 Wiki 文本。
PanDoc 使用方法
通过 PanDoc 比较重要的大概是我们可以直接将 md 文档转为 docx,pdf 等格式了,只要安装了 PanDoc 再使用 export 即可。


