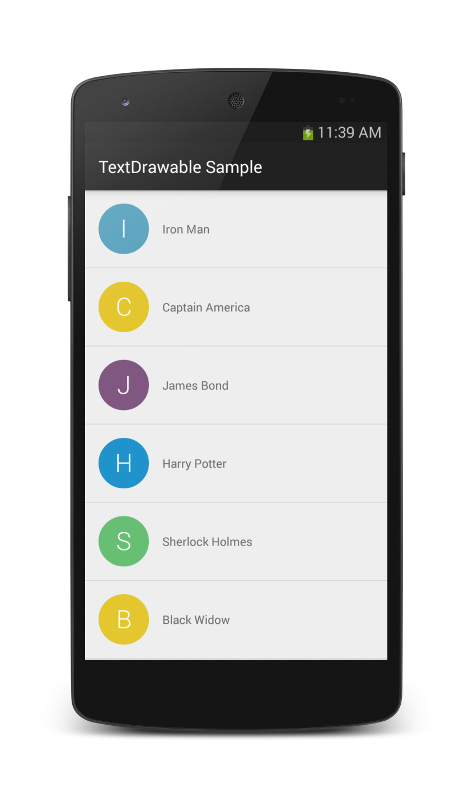
Drawable 是 Android 绘制机制的代表,很多时候实现绘制效果并不需要自定义控件,这里谈谈如何自定义 Drawable 以及如何产生动画效果。
自定义Drawable的典型例子:FadeDrawable(Picasso)
Picasso 中加载完 Bitmap 后有一个渐显效果,这是通过自定义 FadeDrawable 来实现的,其简单逻辑如下
1
2
3
4
5
6
7
8
9
10
11
12
13
14
15
16
17
18
19
20
| public class FadeDrawable extends BitmapDrawable {
private long mStartTime = 0;
private long mDuration = 2000;
@Override
public void draw(Canvas canvas) {
super.draw(canvas);
long time = System.currentTimeMillis() - mStartTime;
if(time<mDuration){
int alpha = (int) (255 * max(0, time) / mDuration);
setAlpha(alpha);
invalidateSelf();
} else {
setAlpha(255);
}
}
public void fade(){
mStartTime = System.currentTimeMillis();
invalidateSelf();
}
}
|
这样调用 fade() 方法后,在两秒内将有一个渐显得动画效果出现。
实际上这个效果还可以通过属性动画来实现
1
2
3
4
5
6
7
8
| ValueAnimator va = ValueAnimator.ofInt(0, 255).setDuration(2000);
va.addUpdateListener(new ValueAnimator.AnimatorUpdateListener() {
@Override
public void onAnimationUpdate(ValueAnimator animation) {
bitmapDrawable.setAlpha((Integer) animation.getAnimatedValue());
}
});
va.start();
|
这是通过操纵 bitmapDrawable 对象来实现的,实际还可以直接操作 ImageView 控件来实现。
1
| mImageView.animate().alpha(1f).withLayer().setDuration(2000).start();
|
这三种方法第三种间接,第一种封装性好,适合广泛性。
自定义 Drawable 的典型方法就是通过设置参数来控制绘制效果,既可以通过设置条件来终结重绘过程,亦可以直接使用属性动画。
PathDrawable 及动画
通过构建路径具备相当的灵活性,可以实现什么绘制效果主要取决于想象力。
应该注意到路径的初始化应该放在如下方法中
1
2
3
4
| @Override
protected void onBoundsChange(Rect bounds) {
super.onBoundsChange(bounds);
createPath();
|
其次记录路径的描述点最好使用二维数组
1
| private float[][] as = new float[2][5];
|
这样可以便于构建对象的属性对象(Property)
1
| Property<View, float[][]> mBProperty = new Property<View, float[][]>(float[][].class, "bs")
|
例如抽屉控件中的 DrawerArrowDrawable 就是一个典型的 PathDrawable,且有动画效果。它的绘制效果是绘制三条线,同时采用一个 process 参数(float)来控制线的起始位置和长度,以及旋转角度。其实现可以简化为
1
2
3
4
5
6
7
8
9
10
11
12
13
14
15
16
17
18
19
20
21
22
23
24
25
26
27
28
| @Override
public void draw(Canvas canvas) {
Rect bounds = getBounds();
int width = bounds.width();
int height = bounds.height();
float midX = 0;
float midY = bounds.centerY();
float topY = lerp(midY - height / 3, midY, mProgress);
float botY = lerp(midY + height / 3, midY, mProgress);
float dx = lerp(width, width / 2, mProgress);
mPath.rewind();
mPath.moveTo(midX, midY);
mPath.rLineTo(width, 0);
mPath.moveTo(midX, botY);
mPath.rLineTo(dx, midY + height / 3 - botY);
mPath.moveTo(midX, topY);
mPath.rLineTo(dx, midY - height / 3 - topY);
mPath.close();
canvas.save();
float rotate = lerp(0, 270, mProgress);
canvas.rotate(rotate, bounds.centerX(), bounds.centerY());
canvas.drawPath(mPath, mPaint);
canvas.restore();
}
|
这样绘制路径就被 mProcess 参数完全控制了,可以对其使用属性动画。

TextDrawable 继承 ShapeDrawable,它之所以能够绘制文字和底边是使用 Paint 的结果,绘制文字的核心代码如下
1
2
3
4
5
6
7
8
9
10
11
12
13
14
| @Override
public void draw(Canvas canvas) {
super.draw(canvas);
Rect r = getBounds();
int count = canvas.save();
canvas.translate(r.left, r.top);
int width = this.width < 0 ? r.width() : this.width;
int height = this.height < 0 ? r.height() : this.height;
int fontSize = this.fontSize < 0 ? (Math.min(width, height) / 2) : this.fontSize;
textPaint.setTextSize(fontSize);
canvas.drawText(text, width / 2, height / 2 - ((textPaint.descent() + textPaint.ascent()) / 2), textPaint);
canvas.restoreToCount(count);
}
|
这里画笔的对齐方式设置成居中 Paint.Align.CENTER,绘制点在水平方向上位于半宽度,在垂直方向上需要得到 baselinde 的位置,而不是垂直居中的位置。
以字体尺寸为 24sp 的 Paint 而言,其 ascent 值为 -22.265625, descent 值为 5.859375,二者的差值即为从中线向下的偏移量。
该库的使用时应该有个有意思的点:
1.用两个 TextDrawable 合成 LayerDrawable,造成各占据一边的结果
1
2
3
4
5
| Drawable[] layerList = {
new InsetDrawable(left, 0, 0, toPx(31), 0),
new InsetDrawable(right, toPx(31), 0, 0, 0)
};
return new LayerDrawable(layerList);
|
2.形成 AnimationDrawable 帧动画。
1
2
3
4
5
6
7
| AnimationDrawable animationDrawable = new AnimationDrawable();
for (int i = 10; i > 0; i--) {
TextDrawable frame = builder.build(String.valueOf(i), mGenerator.getRandomColor());
animationDrawable.addFrame(frame, 1200);
}
animationDrawable.setOneShot(false);
animationDrawable.start();
|
这样实现的动画效果,实际并不聪明,浪费内存。
MaterialProgressDrawable(SwipeRefreshLayout)
MaterialProgressDrawable 是一个典型的循环动画 Drawable,
1
2
3
4
5
6
7
8
| @Override
public void draw(Canvas c) {
final Rect bounds = getBounds();
final int saveCount = c.save();
c.rotate(mRotation, bounds.exactCenterX(), bounds.exactCenterY());
mRing.draw(c, bounds);
c.restoreToCount(saveCount);
}
|
从绘制方法上看,动画效果是通过rotate操作达成的,具体绘制委托给了 Ring 对象。

